Friday, November 29, 2013

Christmas mini vignettes on cards and tags

Christmas trees are everywhere decked in all kinds and manner of ornaments. I decided to put up some "crafty" mini vignettes in keeping with the spirit of the season.. these are my first set...


Here is my first vignette with my favourite stone string and below is my next with twigs i found around


Makes a great card or gift tag... what say?


Here is my glass pebble vignette... love the colours of the pebbles


And lastly my mini wreaths done with craft supplies.. that is  a nice design punch and the other is with jewellery rings... well what do you think?

Read More »

Wednesday, November 27, 2013

Brilliant beadwork

 This is simply some of the best bead work I have come across; I just had to share this! These acorns could have been real but for the colour and shine of the beads! This work is by Mixed media artist Meredith Dada. Do check out her fabulous birds and other decor objects at her store all of which are hand beaded!


And she has an online shop with the most amazing beaded things you ever saw. Check it out here. She also has an Etsy shop which you can check out here.


Oh! I just cannot get over the completely drool worthy stuff she has!


Read More »

Monday, November 25, 2013

A fun DIY accent for the table

This is one of the many coaster crafts I have done since I am now an established coaster freak. Few people who like craft can resist a crocheted coaster and I simply had to have these - they looked so vintage and pretty. Here is how I used two of them.


I got two of the pretty coasters together with a bamboo skewer. Aren't  they pretty?


Using fabric glue I stuck the skewer to the centre of the wrong side of one of them and put on a scotch tape for good measure.


The ran the glue around the edges of the wrong sides of both coasters


And stuck them together. I added a wooden bead to the centre of each side and viola! 


a funky crochet accent is ready in a snap. Don't you simply adore the whimsy of it!

Read More »

Friday, November 22, 2013

DIY tealight holder

I bought this set of bangles a few years ago and have never really worn it. Can't explain that because I use all bangles I buy. Every time I saw it I felt guilty so finally I decided to do something about it. This project is really simple and super fast. I am not one to spend an entire day working on a project - just too impatient! It's got to get done in under an hour tops and this one just fits the bill.
So here they are... colourful and pretty actually - my bangle set. You will need to decide on the glue for this one.I went with fevibond as these are metal bangles. For  glass bangles the hot glue gun should work well.


So this is how it works. Place a bangle on your work top and run around the top of it with the glue placing glue beads every so often. Press the second bangle on top of it slightly, run the glue over the second bangle and press the third one over it and so on forming a colourful tower. These bangles are handmade so they are not precise and I have probably worn them a couple of times so they are not evenly round as well, but the glue holds in many places and works well to hold the whole thing in place.


Here is a closer look at the glue beads after I ran the bangle over with fevibond.


Keep going till all bangles are done or till it is about the size of an average tea light no more..I am done with mine and then I placed a tea light inside to see how it looked. Great! The unevenness of the bangles allow for light to seep through in a nice random fashion. If your idea is to use it as a tea light holder I would say avoid using plastic bangles.. they may melt due to the heat generated by the flame. Colourful and gold dusted glass bangles will also look great and festive. You could place a glass or metal plate below it but I  guess just placing the tower around the tea light is sufficient


When I am not using it as a tea light I corral my daughter's stuff into a bowl which I place on top of this colourful tower like so


A pretty hard working bangle tower I say. What do you think? Happy weekend!


Read More »

DIY brush holder

I did this in about half an hour one fine afternoon. You know I am a sort of coaster collector so hubby got me this set from Vietnam. Soon after, I was itching to do something with one set since he got me two. So I spread them out for a good look.. 


Pretty! I stared for a while went about my evening chores and went to bed. The next morning I knew what to do, so I commissioned my daughter ( I had to get to work and in any event she is more precise with her measurements and best of all she had a holiday.. so) to cut out a square of cork board which she was using for her project. When I got back she handed me a precisely cut square and I set to work pasting the squares around the cork board with my trusty hot glue gun.


The coasters are hand made so it does not fit with exacting precision but hand made has a charm of its own and it stuck well.


Here it is  all done and holding my brush and comb set.  Well what do you think?


Read More »

Tuesday, November 19, 2013

Three funky bookend ideas

Maybe it is the era of the internet and all that but most of us will agree that at some point or the other the idea of sitting by the window sipping hot tea and reading the a magazine or latest best-seller or an old classic has a charm or romance which is unparalleled. Anyway point is that we own books and we store them maybe in a book shelf maybe in a display shelf.. so we have bookends.. no? maybe? At the end of this blog post I hope you will say yes to bookends... of the kind that will bring a smile on to your face. Here are three from my collection.

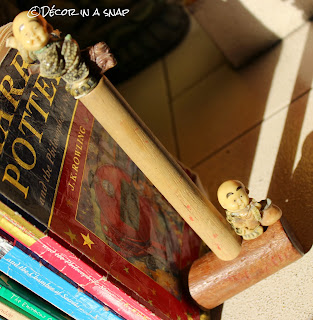
This, the first is at the end of my son's dog eared books which I retire from time to time to the big book cupboard. Now that is a dark place literally (not much sunlight!) to I took a selection out with the bookend I made. 


I saved that old wooden hammer from a toy set and these two adorable fellows are from a Chinese shop in the upper floors of the Deira City Centre (Dubai) of the old when Ikea was in it...Take a closer look - they are super cute! I have put a bit of blu tac below the hammer and the two little fellows..


On to the next one


This cute little bunny is from a little shop near a tram station in Vienna - I will find the name somehow. I somehow failed to note the name! Look at the ruffles on her skirt! Adorable!


And her shoe laces...

And the third one. I must admit that this is one that I keep away in my display cupboard. Only because unlike the other two which are made from resin, this one is mostly ceramic and I cannot even imagine the books falling over them. So yes it is a set up but I promise I am going to make this real when I manage to make more place in my book shelf and put the books into one of those almost invisible Ikea bookends.


Ain't that sweet! And they are from across the globe spanning the countries of Austria, England and Australia! And yes  I will only use this tableau to pretty up a proper but less visible bookend! 


Look at that little doggie! One day I will write a post on some of the loveliest shops  have had the pleasure to visit around the world!

Do you have decor vignettes that make you smile? Mail me!


Read More »

Saturday, November 16, 2013

Reusing everyday objects as lamp holders this Karthigai

Hi all! Tomorrow (this Sunday) all over South India we celebrate a festival of lights called Karthigai Deepam. This is when we light lamps all around our homes like we do during Deepavali. Very very simply put, it is a celebration of the inner strength of the woman.  
Well this time I have decided that in addition to the beautiful lamp I bought for Deepavali I thought I would reuse some things that are used around the house for other purposes, not only because it is green but because it gives me a lot of creative latitude. Take a look see and let me know how you like it... 
Caution: This is a very long and picture heavy post!

Starting with the junk options...


This is an assemblage of the various things that sit in my little garden area... objects which I don't pay as much attention to as I perhaps should... better late than never I guess!


You do remember this guy from my old post right? This is my garden doorstop.


This iron pot looks much better here among the ruins of the shelf as it were...never thought I would use the word gorgeous for this but that is how it looks! So it will remain here forever...

Next comes my decadent vignette all gold and Strala battery lights... this is my entryway special so no one gets hurt coming in.. and there is so much wood close by too


Love it... especially the antique looking seahorse for which I paid a pretty packet in Bangkok - worth every Thai Baht though and then there is the diamante studded flower lamp which I bought a pair of for my friend.. somehow one ended up on my tableau!


Here is a closer look at the gorgeous lamp which I got from Home and Style.


Another set of lamps that use objects that don't normally have tea lights in them. There is the copper pen stand, the mini kadai and the made up urulis...sitting on an incredibly carved (and chipped by all the boys of the family) centrepiece.


Here is another look at the components. Don't miss the odds and ends which I had to add..


Of course I have a quirky option for my kitchen! The muffin pan is just right for the set of six


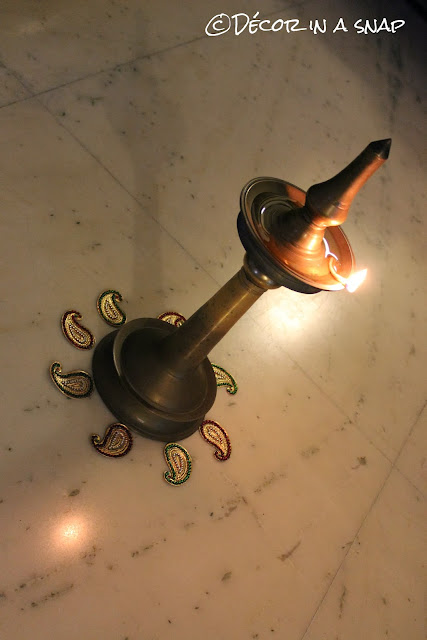
And now for the grand finale... the grand dame of all Indian lighting options... the kutthivilakku. This one is very ancient and has been passed down the generations. No adornment required... looks gorgeous all by itself. I just had to add the Tanjore touch... . These beautiful motifs are from Lotus and I don't think Abirami who runs the store has a facebook page or website but quite frankly I don't think she has the time... she is always beseiged with custom orders. Nevertheless I will ask the next time I meet her.


That's it then... happy Karthigai Deepam to all those celebrating and a happy weekend to everyone!


Read More »

Friday, November 15, 2013

Make something interesting with a basket

I confess to being a basket addict and I am especially partial to little baskets, so I do have a few of them lying around... and since I am now in a mood to put things together or throw them out, I decided to do something about this little black basket because I could not bring myself to fling it out.
 
So here is a look at the said basket


I had just bought a set of red and black beads on a whim and I remembered the black and orange bell that my dear friend had presented to me. It has pretty cut work in orange. So I pulled out an orange jewellery thread, my trusty gold wire, my favourite tiny ghungroos and set to work...


This is the result of twenty minutes of cutting, threading and twisting wire I made a garden variety dangler. Looks pretty anywhere, more pretty in the garden.


If you like it do leave a comment and if you have  variation of this or something like this please send me some picks or backlink with this post so we can have a little basket party of sorts!

Read More »

Wednesday, November 13, 2013

Amazing wire art

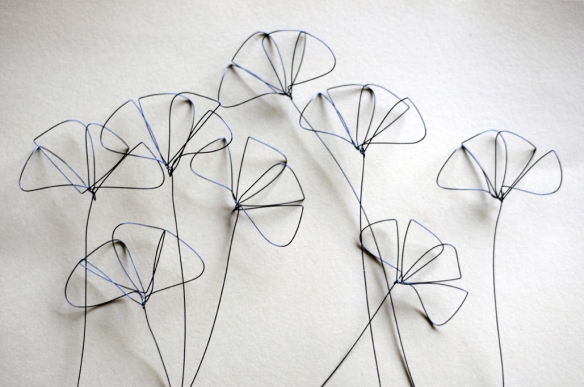
I am constantly amazed at people who can make wire into a picture like Miro at Fold has. Do take a look at some of her amazing creations. 

poppies

Just look at the poppies here. They look almost real and seem to be dancing to her tunes.  But my favourite is Rudolph with his red nose. And then there are her descriptives... it is refreshing to read them.  I am not going to say any more because my words do not do justice to her creations . Do stop at Miro's blog  simply called Fold and be amazed...


Read More »

Monday, November 11, 2013

From trash to treasure in a snap

Last afternoon while I was sitting out waiting for my son to come back from school I found this piece of bark from a young coconut tree.


I picked it and thought what a lovely texture it had... looked rather like the expensive but rustically beautiful Micheal Aram creations. I brought it home and set to work on it. The whole bark is rather unstable and would not sit flat so I trimmed the edges.


Even after trimming the edges I had to weight it down with glass pebbles to flatten out  a bit of the bottom. I cleaned it just enough so the stains would still stay and then gave it a few swipes of gold paint - more at the edges and just swats inside and outside.


When that dried I sprayed on fast drying varnish so that it will stay for a while and let it dry. That is about all the treatment this requires. The rest is left to imagination. I decided that I would use it to hold diyas, preferably battery operated or tall ones holding tea lights. Eco friendly and close Nature also means extra caution.
So here are my vignettes...


Just as a display piece with a diya and my favourite decorated glass pebbles this piece of Nature looks lovely...


But wait! With IKEA's Strala battery operated lamp it looks even better.. what do you think... is one enough or maybe three?


I must say that Nature offers us the most brilliant centrepieces. Do you agree?

Read More »

Saturday, November 9, 2013

Repurposing coasters

Yeah I know this has been done to death but trust me this one is good...if you, like me,  have the habit of collecting coasters because they are cute and different you are likely to be left wondering if there is another nice way of using them.. well me too. I bought this set of translucent coasters in Sydney because I loved them very funky and what can I say I had to have them. I used the as coasters for a bit and then the repurposing bug started to eat into me... soon enough I obtained this rubbermaid box and lost its lid...and I did not want to throw it out. That is when the idea hit and out came the glue drops and here is the result. What do you think?


I had four coasters and so I stuck four of them on the four sides of this box... looks pretty and holds all my herb tea bags. Let's take a closer look at the coaster


Sweet nah? And here is my cup of herb tea


It looks pretty even sitting in my kitchen cupboard and I must admit that I set this tray up for this post. That kettle actually has other uses. Soon enough I shall reveal what it actually holds...watch this space!!
Read More »

Wednesday, November 6, 2013

Rustic DIY garden wind chime

Hi there friends! hope you all had a happy Diwali! I had an absolute blast!  It is good to be back after a break and I was anyway dying to share this with you all.  I have already featured a plant pot wind chime in one of my earlier posts but wanted to do something that did justice to the one I saw while browsing through one of my favourite blogs Funkyjunk interiors. So here is the inspired chime which is a snap to do. Looks so pretty too. I just love the play of colours on the pots which makes it suitable for indoor and outdoor use.


These inexpensive pots can be found at any local exhibition and the best part is that putting this together involves almost no effort since they already have holes, just a rope which is run right through and knotted at the bell and then to hold each inverted pot in place..
Check out the source of inspiration here at Funkyjunkinteriors.

Here is the one step chime I posted a while ago with just one pot. I have since unearthed the other and created the double layered look.


Read More »
/*facebook button*/
/*facebook button end */